Building a Fishing Boat with Easy-to-Follow Plans

Sunday, November 24, 2024

Building a Fishing Boat with Easy-to-Follow Plans

Beyond the Plans: Uncharted Waters in Building Your Fishing Boat

Building a fishing boat is a monumental undertaking, a blend of artistry, engineering, and sheer grit. While numerous guides like "Building a Fishing Boat with Easy-to-Follow Plans" offer blueprints, the real challenge lies in navigating the uncharted waters of personal innovation and problem-solving. This review isn't about following the instructions; it's about questioning them, challenging assumptions, and exploring the hidden depths of boatbuilding.

The Unspoken Costs: Beyond Lumber and Epoxy

Most plans focus on material costs, but what about the less tangible expenses? Let's delve into some often-overlooked aspects:

Q: How do I factor in the "opportunity cost" of my time?

A: This is crucial. Building a boat takes time â€" potentially months or even years. Calculate your hourly rate in your current profession and multiply it by the estimated build time. This gives a realistic picture of the project's true financial investment. Consider the missed opportunities for income or leisure activities. For example, a professional earning $50/hour and spending 500 hours building a boat has a significant hidden cost of $25,000.

Q: What about the mental toll of unforeseen setbacks?

A: Boatbuilding is fraught with challenges. Unexpected wood defects, tool malfunctions, and design flaws can be incredibly frustrating. Factor in the potential stress and its impact on your well-being. Building a boat should be enjoyable, but managing expectations is key. Maybe you want to allocate some budget for stress relief activities parallel to your building project.

Sustainable Boatbuilding: A Greener Approach

The environmental impact of boatbuilding is rarely discussed. Let's consider some sustainable alternatives:

Q: How can I minimize waste during construction?

A: Precise planning is paramount. Utilize CAD software to optimize material usage and minimize cuts. Explore the possibility of using reclaimed wood, ethically sourced lumber, or even sustainable composites like bamboo or recycled plastics. Properly dispose of any leftover materials responsibly.

Q: Are there eco-friendly finishes and coatings?

A: Traditional boat finishes often contain harmful chemicals. Research low-VOC (volatile organic compound) or water-based alternatives. Consider natural oils and waxes for a more environmentally friendly finish. This adds to the overall cost, but prioritizes long-term health and environmental impact.

Beyond the Blueprint: Personalizing Your Craft

Generic plans are a starting point, not a bible. Personalization is key. Let's explore ways to inject your unique style and needs into the design:

Storytelling Through Design:

Meet John, a retired carpenter who used reclaimed wood from an old barn to build his fishing boat. Each plank holds a story, each knot a memory, making his boat far more than just transportation â€" it’s a floating testament to his life's journey. This unique approach adds sentimental value and differentiates the project from a standard build. Consider incorporating personal touches like custom carvings or painted designs that reflect your personality and interests.

Adapting to Your Fishing Style:

The "easy-to-follow" plans might be generic. Customize them! Are you targeting specific fish? Adjust storage for tackle, add specialized rod holders, or modify the hull for optimal performance in your local waters. Your boat should be perfectly tailored to your unique fishing needs.

Conclusion: Charting Your Own Course

Building a fishing boat using plans is a journey, not a destination. This review encourages you to move beyond simply following instructions and to actively engage in critical thinking, sustainable practices, and personal expression. By considering the unspoken costs, embracing eco-friendly alternatives, and personalizing your design, you'll not only create a functional fishing boat but also a truly unique and rewarding testament to your skills and vision.

Read More..

How to Scale Jon Boat Plans for Larger Projects

How to Scale Jon Boat Plans for Larger Projects

Beyond Simple Scaling: Unveiling the Secrets of Jon Boat Plan Upscaling

Scaling up a Jon boat plan seems straightforward: multiply dimensions. But experienced builders know there's more to it than that. This review dives into the often-overlooked nuances, offering fresh perspectives for hobbyists, professionals, and educators alike, moving beyond the rudimentary "multiply by X" approach.

The Myth of Linear Scaling: Why Bigger Isn't Always Better (or Simpler)

Many readily available Jon boat plans focus on smaller vessels. The allure of a larger boat is undeniable, but simply enlarging the plans proportionally ignores crucial factors. Let's tackle this with a Q&A:

Q: If I double the dimensions of a Jon boat plan, will I effectively double the boat's capacity?

A: Absolutely not. While you'll double the length and width, you're actually quadrupling the surface area and eight times the volume (assuming a consistent depth). This dramatically increases the material requirements and the structural stresses on the hull. A design suitable for a 10ft boat might catastrophically fail at 20ft, even with proportionally thicker wood.

Q: What about weight and buoyancy? How do they change with upscaling?

A: Weight increases proportionally to volume (approximately eight times in our example), while buoyancy is related to the water displacement, which is also significantly increased. However, the *ratio* of weight to buoyancy changes. A larger boat requires a more robust design to counteract the increased stresses, and the hull's shape might need adjustments to maintain stability.

Beyond Simple Numbers: The Art of Proportionate Strengthening

Scaling a Jon boat successfully requires a deeper understanding of structural mechanics. Simply increasing the thickness of planks isn't sufficient. Consider these points:

  • Frame spacing: Closer framing is essential for larger boats to handle the increased stresses. Simply scaling the frame spacing proportionally will be insufficient.
  • Material selection: You might need to transition to stronger, heavier timbers for the larger vessel. The lightweight wood suitable for a smaller boat could be inadequate for a larger one.
  • Hull shape optimization: The original hull shape might not be optimal for the larger scale. Software like Rhino or FreeCAD could help optimize the hull design for stability and structural integrity, leveraging computational fluid dynamics (CFD) for finer tuning. This is often overlooked in simple scaling.

Real-World Examples and Case Studies

Let's look at a hypothetical scenario: A builder successfully scales a 10ft Jon boat plan to 12ft using linear scaling. The boat works, but it's noticeably less stable in choppy waters. Why? The increased surface area, even with thicker planks, created disproportionate stresses. The solution? Reinforcement of the transom and gunwales, along with adjustments to the hull shape.

Another example: A woodworking class attempts to upscale a small Jon boat design for a larger project. They simply multiply all measurements by 1.5. The result? A structurally weak boat that leaks and is prone to flexing. The lesson? Careful consideration of structural mechanics and material selection is crucial, even when utilizing readily available plans.

The Future of Jon Boat Upscaling: Software and Advanced Techniques

Moving beyond manual scaling, digital design tools offer powerful capabilities. Software like Rhino or Fusion 360 allows for parametric modeling â€" you can easily adjust individual components and see the impact on the overall structure. This enables iterative design refinement and optimization, leading to a stronger, safer boat. This approach introduces a level of precision and control rarely seen in traditional upscaling methods.

In conclusion, while scaling a Jon boat plan might seem simple at first glance, success relies on understanding the complex interplay of factors beyond simple multiplication. By embracing advanced techniques and a deeper appreciation for structural mechanics, builders can unlock the potential of larger Jon boats while avoiding common pitfalls.

Read More..

Wooden Boat Plans for Beginners to Build Your Dream Vessel

Wooden Boat Plans for Beginners to Build Your Dream Vessel

Wooden Boat Plans for Beginners: Beyond the Blueprint

Building a wooden boat is a dream for many. It's a blend of art, engineering, and sheer stubborn determination. But what if the journey to your dream vessel started with a deeper understanding, beyond the readily available plans? This article delves into often-overlooked aspects of building a wooden boat from scratch, offering fresh perspectives for both seasoned woodworkers and enthusiastic beginners.

The Unspoken Truth: Material Selection Beyond the Species

Choosing the right wood is crucial, but most plans simply state "oak" or "cedar." The real challenge lies in understanding the specific characteristics of your chosen wood within that species.

Q: How do variations within a wood species impact boat building?

A: A piece of oak from a fast-growing plantation will have a different density and strength than one from a slow-growing, old-growth forest. This impacts everything from the structural integrity of your boat to its overall weight and lifespan. Consider sourcing your lumber with the specific properties in mind â€" checking moisture content and grain orientation meticulously. Consult with lumber suppliers; they are often a treasure trove of information about their stock's unique characteristics.

Q: Are there less common but suitable wood alternatives for beginners?

A: Absolutely! While traditional boatbuilding often focuses on specific species, exploring readily available, affordable alternatives can open up possibilities. For example, certain engineered woods, while not traditionally used, may offer exceptional strength-to-weight ratios, particularly for smaller projects. Researching their properties and suitability is crucial, but the potential cost and weight savings can be significant. The key is thorough research and careful analysis of the wood's properties relative to the plan's requirements.

Beyond the Lines: The Importance of Understanding the "Why"

Most plans provide a detailed "how," but understanding the "why" behind each step is what transforms a builder into a true craftsman. This holistic approach minimizes errors and cultivates a deeper appreciation for the craft.

Q: How does understanding structural principles enhance the building process?

A: Simply following the plans is one thing; understanding the principles of boat design â€" buoyancy, stability, and hull form â€" is quite another. This knowledge allows you to troubleshoot unexpected issues, make informed modifications, and even adapt your plans to suit different conditions or materials. Resources like naval architecture textbooks and online courses are invaluable here.

Q: How can you gain a deeper understanding of boatbuilding techniques?

A: Go beyond just reading plans. Study existing boats, visit boatyards (with permission), and even consider shadowing experienced boatbuilders. The experience of observing skilled hands at work is unparalleled. This hands-on learning complements book knowledge, offering crucial insights into practical techniques and problem-solving strategies.

The "Hidden" Costs: Beyond the Lumberyard

Building a wooden boat is an investment, but the costs often extend beyond the obvious.

Story Example:

A friend of mine, eager to build a small sailboat, meticulously calculated the lumber costs. However, he underestimated the cost of specialized tools (like a spokeshave or specialized clamps), consumables (epoxy, fasteners), and the hidden cost of time. He also neglected the potential for mistakes and material waste. Learning from his experience, create a detailed budget that encompasses all aspects, including potential rework, and factor in unexpected expenses. Treat this as an exercise in financial planning as much as in woodworking.

Conclusion: Your Journey to the Open Water

Building a wooden boat is a challenging but immensely rewarding endeavor. By moving beyond the surface of readily available plans and incorporating these often-overlooked aspects, you embark on a journey of true craftsmanship, transforming your dream into a reality. The process itself becomes as fulfilling as the final productâ€"a testament to your skill, patience, and understanding of both wood and water.

Read More..

How to Choose the Right Stitch & Glue Boat Plans for Your Project

How to Choose the Right Stitch & Glue Boat Plans for Your Project

Beyond the Blueprint: Unveiling Hidden Factors in Choosing Stitch-and-Glue Boat Plans

Choosing stitch-and-glue boat plans feels like navigating a sea of options, doesn't it? This isn't just about picking a pretty picture; it's about selecting a project that aligns with your skills, resources, and ultimate vision. This article delves beyond the obvious, exploring often-overlooked aspects to help you make the *perfect* choice.

Beyond the Hull: Unpacking the Unspoken Elements

Q: My skillset is intermediate. How do I avoid "plan paralysis"?

A: Many plans boast beginner-friendliness, but experience levels are subjective. Instead of focusing solely on the claimed skill level, analyze the plan's construction details. Look for:

  • Component complexity: Are the parts simple, or are there intricate curves and compound angles requiring advanced woodworking skills?
  • Joinery details: Does the plan utilize robust, beginner-friendly joinery techniques or more advanced methods?
  • Number of parts: Fewer, larger components are generally easier to manage than numerous small pieces.

Consider starting with a smaller, simpler design even if you feel capable of a larger project. Building a successful smaller boat first will boost confidence and hone your skills significantly before tackling a more ambitious undertaking. Remember, a completed smaller boat is a greater achievement than an unfinished larger one!

Q: How can I factor in long-term maintenance and material costs?

A: This is where many builders get caught off guard. The initial cost of plans and materials is just the beginning. Consider these less-discussed factors:

  • Material durability and longevity: Some woods and plywood types offer better resistance to rot and UV damage than others. This translates to lower maintenance costs down the line. Research this aspect thoroughly. Data from sources like the West System epoxy website can prove invaluable.
  • Design features: A simpler, more traditional design might require less frequent maintenance than a boat with intricate detailing or complex hull shapes.
  • Future upgrades: Think about possible future modifications. A plan that allows for easy addition of features (e.g., a motor mount) provides flexibility.

Let's say you're comparing a simple, cedar-strip canoe plan with a more complex fiberglass-hulled sailboat design. The cedar-strip might have a higher initial material cost but significantly lower long-term maintenance costs compared to the potential for fiberglass repairs.

Beyond the Plan: The Unsung Heroes of Success

The Power of Community and Mentorship:

Don't underestimate the power of connection. Forums, online communities dedicated to stitch-and-glue boat building (like those on WoodenBoat.com or similar sites), and local boatbuilding clubs are goldmines of knowledge and support. Sharing your journey and seeking advice from experienced builders can prevent costly mistakes and accelerate your learning. Remember â€" it's not a solo endeavor.

The Hidden Cost of Time:

Boat building is time-consuming. Realistic time estimates in plans are often optimistic. Factor in potential delays due to material sourcing, tool issues, or unexpected complexities. Treat the time commitment as a serious factor when choosing a project, ensuring it aligns with your available time and patience levels. A rushed project often leads to compromised quality and frustration.

Conclusion: Charting Your Course to Success

Selecting the right stitch-and-glue boat plans is a strategic decision. By moving beyond the aesthetic appeal and considering the hidden elements â€" your own skillset, long-term maintenance, community support, and realistic time commitment â€" you'll be better equipped to choose a project that brings joy, fulfillment, and, ultimately, a beautiful boat to the water. Happy building!

Read More..

Fiberglass Boat Building for Expert Craftsmanship and Design

Fiberglass Boat Building for Expert Craftsmanship and Design

Beyond the Resin: Unveiling New Frontiers in Fiberglass Boat Building

Fiberglass boat building, a seemingly mature field, continues to offer exciting possibilities for innovation. This isn't just about tweaking existing techniques; it's about rethinking fundamental approaches, integrating emerging technologies, and embracing sustainable practices. This article explores some less-discussed aspects of fiberglass boat construction, offering fresh perspectives for both seasoned professionals and aspiring boat builders.

The Unsung Hero: Core Material Selection and its Impact

While resin and fiberglass cloth are the stars of the show, the core material often gets overlooked. It's not just about choosing the cheapest option; the core dictates many crucial properties of the final boat.

Q: Beyond traditional balsa and foam, what are some emerging core materials showing promise?

A: Recent research is exploring the use of recycled materials like PET foam and even bio-based alternatives derived from plant fibers. These offer both performance advantages (like improved compressive strength) and significantly reduce the environmental footprint compared to traditional petroleum-based foams. While cost might currently be a barrier, these materials represent the future of sustainable boat building. Further, investigations into using honeycomb structures from sustainable materials are showing interesting results in terms of weight reduction and strength.

Q: How can core material selection impact the boat’s performance and longevity?

A: Consider this: a denser core might lead to a heavier but stiffer hull, better suited for rough seas. A lighter core, such as certain types of closed-cell foam, could prioritize speed and fuel efficiency. Understanding the long-term performance of different core materials under varying environmental conditions (UV exposure, moisture absorption) is crucial for maximizing the boat's lifespan. Data on degradation rates under specific climate conditions, for instance, needs further study to refine selection guidelines.

Designing for Durability: Beyond the Standard Layup Schedule

The traditional layup schedule, while effective, isn’t always optimal. Thinking outside the box can lead to significant improvements in strength and durability.

Q: How can advanced modeling techniques help optimize layup schedules?

A: Finite Element Analysis (FEA) software allows for precise modeling of stress distribution under various loading conditions. By simulating real-world scenarios (waves, impacts), builders can optimize fiber orientation and resin distribution to create stronger, lighter hulls. This precision minimizes material waste and enhances overall performance. This approach moves beyond rule-of-thumb layup schedules to a data-driven, highly efficient process.

Q: Can we integrate smart materials for self-monitoring and damage detection?

A: Imagine a hull embedded with sensors that detect micro-cracks or delamination before they become major issues. This is becoming a reality with the development of smart materials and embedded sensor technologies. While still in its early stages in boat building, the potential for predictive maintenance and enhanced safety is enormous. This technology represents a paradigm shift from reactive repair to proactive maintenance.

The Human Element: Craftsmanship in the Age of Automation

While automation plays a role, the human element remains vital in fiberglass boat building. Skilled craftsmanship is still the key to producing high-quality, durable vessels.

Story: I recently spoke with a master boat builder who, despite having access to advanced tools, still meticulously inspects every layer of fiberglass during the layup process. His experience allows him to identify even minor imperfections that automation might miss. His expertise, honed over decades, is invaluable in ensuring the structural integrity and longevity of the boat.

This underscores the importance of apprenticeships and skills training programs in maintaining the high standards of craftsmanship needed in this industry.

The Future is Sustainable: Eco-Friendly Materials and Processes

The environmental impact of boat building is a growing concern. The industry needs to transition toward more sustainable practices.

  • Bio-resins: Research into plant-based resins is yielding promising results, offering a viable alternative to petroleum-based resins.
  • Recycled materials: As mentioned earlier, utilizing recycled materials in the core and fiberglass reinforcements reduces waste and reliance on virgin resources.
  • Waste reduction: Implementing lean manufacturing principles and minimizing resin waste are crucial steps toward a more sustainable approach.
  • By embracing these new perspectives and innovative techniques, the fiberglass boat building industry can evolve towards greater sustainability, enhanced performance, and improved longevity of its products. The future is not just about building boats; it's about building them responsibly and innovatively.

    Read More..

    How to Make a Wooden Boat for Recreation and Outdoor Sports

    How to Make a Wooden Boat for Recreation and Outdoor Sports

    Beyond the Plans: Unveiling Hidden Gems in Wooden Boat Building

    Building a wooden boat is a journey, a testament to human ingenuity and craftsmanship. While countless guides detail the *how*, few delve into the often-overlooked aspects that truly elevate the experience and the final product. This review of "How to Make a Wooden Boat for Recreation and Outdoor Sports" aims to explore those hidden gems, offering new perspectives for both seasoned boat builders and enthusiastic beginners.

    The Unsung Heroes: Material Selection and Sustainability

    Most guides focus on the type of wood, but what about its source? This is where the narrative often falls short. Where did your lumber come from? Was it sustainably harvested? Knowing the origin story of your wood adds a deeper layer to the project, transforming it from a simple build into a conscious creation. Consider using reclaimed wood, responsibly sourced timber from certified forests (like those with the Forest Stewardship Council (FSC) certification), or even exploring locally-grown species adapted to your climate. This not only reduces your environmental footprint but can also unearth unique aesthetic qualities you wouldn't find in commercially available lumber.

    Q: How can I ensure the wood I use is sustainably sourced?

    A: Look for FSC certification labels on lumber, research local suppliers committed to sustainable forestry practices, or explore reclaimed wood options. Websites and organizations dedicated to sustainable forestry practices can provide valuable resources and guidance.

    Beyond Aesthetics: Engineering for Unexpected Conditions

    Building a boat isn't just about aesthetics; it's about engineering a vessel that can withstand the elements. Many manuals provide standard designs, but what about tailoring your boat for specific local conditions? If you live in a region with strong currents or unpredictable weather patterns, you need to engineer for resilience. This might involve adjusting the hull design, reinforcing structural elements, or incorporating advanced sealing techniques to protect against water damage. This personalized approach transforms the boat into a robust and reliable craft ideally suited to its environment.

    Q: My local waters are known for choppy waves. How can I design for this?

    A: Consult naval architecture resources and consider incorporating features like a wider, deeper hull, a stronger keel, and additional reinforcement in high-stress areas. You may even want to explore alternative hull designs, such as a multi-chine hull known for its stability in rough waters. Experimenting with scaled models can provide valuable insights before committing to the full-sized build.

    The Intangible Value: Community and Collaboration

    The journey of building a wooden boat is often solitary, but it doesn't have to be. Engaging with online communities and local woodworking groups can provide invaluable support, share problem-solving techniques, and offer a sense of camaraderie. This collaborative aspect adds another dimension to the experience, transforming it into a shared journey of learning and creation. Sharing your progress, asking for advice, and participating in discussions fosters a sense of community and learning that goes beyond the book's pages.

    Real Story:

    One boat builder I know, struggling with a complex joinery technique, posted a picture on a dedicated forum. Within hours, experienced builders offered solutions, sharing detailed photos and videos of their own techniques. This kind of collaborative support is invaluable and rarely discussed in traditional building guides.

    Conclusion: Embracing the Unwritten Chapters

    While "How to Make a Wooden Boat for Recreation and Outdoor Sports" serves as an excellent foundation, this review highlights the opportunities to expand beyond its pages. By considering sustainability, engineering for specific conditions, and embracing community collaboration, you'll craft a boat that's not just functional and beautiful, but also deeply personal and meaningful. The real journey lies in those unwritten chapters â€" the innovations, adaptations, and connections forged along the way.

    Read More..

    Top Boat Plans Stitch and Glue Method for DIY Builders

    Top Boat Plans Stitch and Glue Method for DIY Builders

    Top Boat Plans Stitch & Glue: Unveiling the Unspoken Secrets for DIY Success

    Stitch and glue boatbuilding, particularly using readily available plans, has exploded in popularity. But while countless articles detail the *how*, fewer delve into the often-overlooked aspects crucial for a truly successful build. This article tackles those unspoken secrets, offering a fresh perspective for both seasoned hobbyists and eager newcomers.

    Beyond the Plans: Material Mastery and the Unexpected

    Let's face it â€" the plans are only half the battle. What about the nuances of plywood selection? Or the often-ignored impact of environmental factors on your build?

    Q: How crucial is plywood grade in a stitch-and-glue project, beyond the plan's specification?

    A: Critically crucial! While plans specify a grade (e.g., marine-grade Okoume), the subtle variations *within* that grade significantly impact the final product's longevity and strength. Consider this: A slightly less dense sheet, even within the acceptable range, might mean increased epoxy consumption or a weaker seam. Inspecting each sheet for knots, voids, and delamination before cutting is a time investment that pays dividends. Research independent plywood testing results (if available in your region) to identify consistently high-quality suppliers.

    Q: How does humidity impact the stitch-and-glue process and the finished boat?

    A: Humidity plays a silent, yet powerful role. High humidity can lead to epoxy curing issues, potentially compromising bond strength. Conversely, extremely dry conditions can cause wood shrinkage, leading to gaps in the seams. Pro Tip: Monitor your workshop’s humidity, using a hygrometer, and adjust your work schedule accordingly. Consider using a dehumidifier in high-humidity environments and a humidifier in extremely dry ones to maintain consistent, optimal conditions throughout the build.

    Optimizing the Process: Efficiency and Innovation

    Stitch and glue is a relatively quick method, but intelligent planning and creative problem-solving can dramatically reduce build time and improve results.

    Q: How can I streamline the often tedious process of stitch drilling?

    A: While hand drilling is traditional, consider using a drill press with a jig. This ensures precise, consistent hole placement, significantly speeding up the process and reducing the risk of misaligned stitches. Innovative Solution: Explore using a CNC router for cutting and drilling, especially for complex hull shapes. While requiring a significant upfront investment, the precision and speed gains can be substantial for multiple builds or complex projects.

    Q: Are there clever alternatives to traditional epoxy application techniques?

    A: Many builders rely on brushes or rollers, but consider using a caulking gun with a specialized nozzle for a more efficient and even epoxy application in tight seams. This reduces waste and improves the consistency of the bond. Further Enhancement: Experiment with vacuum bagging or pressure techniques to remove air bubbles and achieve maximum bond strength, particularly for larger or more complex panels.

    Beyond the Build: Long-Term Care and Unexpected Challenges

    Building the boat is only the first step. Understanding long-term care and anticipating potential problems is essential for enjoying your creation for years to come.

    Story: The Case of the Leaky Seam

    I once spoke to a boat builder whose meticulously crafted stitch-and-glue kayak sprung a leak after only a few months. The culprit? He'd used insufficient epoxy in a particularly stress-prone area near the bow. The lesson? Thorough inspection and over-application of epoxy in high-stress points is crucial for long-term durability. Don’t be shy with the epoxy in critical areas. Prevention is key.

    Stitch and glue boatbuilding offers a rewarding path to owning a custom-crafted vessel. By focusing on material selection, optimizing the process, and understanding long-term maintenance, DIY builders can elevate their projects beyond simple instruction following and craft truly exceptional boats.

    Read More..

    Timber Boat Plans for Schools: A Great Way to Learn Boat Building

    Timber Boat Plans for Schools: A Great Way to Learn Boat Building

    Timber Boat Plans for Schools: A Great Way to Learn Boat Building

    Hey there, fellow boat enthusiasts and woodworking aficionados! Ever thought about combining the thrill of boat building with the rewarding experience of education? Well, let me tell you, timber boat plans for schools are a fantastic way to do just that! Whether you're a seasoned craftsman looking for a new project, an educator searching for engaging curriculum, or simply a hobbyist with a passion for woodworking, this is something you'll want to explore.

    Why Timber Boats are Perfect for Educational Projects

    Building a boat from timber isn't just about hammering and sawing (though there's plenty of that!). It's a fantastic hands-on learning experience that covers a broad spectrum of skills and knowledge. Think about it:

    • Practical Woodworking Skills: Students learn measuring, cutting, shaping, joining, and finishing techniques.
    • Design and Engineering Principles: They grapple with concepts like buoyancy, stability, and hull design. It's science in action!
    • Teamwork and Collaboration: Building a boat requires coordination and communication, teaching valuable teamwork skills.
    • Problem-Solving: Inevitably, challenges arise. Students learn to troubleshoot, adapt, and find creative solutions.
    • Sense of Achievement: The pride of launching a boat they built themselves is an incredibly rewarding experience.

    Finding the Right Timber Boat Plans

    The key to a successful project lies in selecting the right plans. You need plans that are:

    • Appropriate for the Skill Level: Consider the age and experience of the students or participants.
    • Clearly Illustrated and Explained: Detailed instructions with diagrams are crucial for easy understanding.
    • Feasible in Terms of Materials and Budget: Some plans require exotic hardwoods, which might be impractical for schools.
    • Safe to Build: Prioritize plans that emphasize safety throughout the building process.

    Many resources exist online and in print that offer plans specifically designed for educational settings. Don't be afraid to adapt plans to fit your needs and available resources.

    Beyond the Basics: Expanding the Learning Experience

    Integrating Curriculum

    Timber boat building projects can seamlessly integrate with existing school curricula. You can connect it to math (calculations, measurements), science (physics, engineering), history (shipbuilding history), and even art (design aesthetics).

    Community Engagement

    Involve the local community! Invite local boat builders to share their expertise, or partner with a maritime museum for a field trip. The possibilities are endless!

    Sustainability and Environmental Awareness

    Consider using sustainably sourced timber and discuss environmental impact throughout the project. This adds another layer of learning and responsibility.

    Getting Started: Tips for Success

    Planning is Key: Thoroughly review the plans, gather the necessary materials, and create a realistic timeline.

    Safety First: Always emphasize safety procedures, from proper tool usage to wearing appropriate protective gear.

    Celebrate the Process: Document the build with photos and videos. This creates a lasting record of the project and showcases the students' hard work.

    Enjoy the Journey: Remember, the most important thing is the learning experience. Embrace the challenges, celebrate the successes, and have fun!

    Frequently Asked Questions

    Q: Where can I find suitable timber boat plans for schools?

    A: Many online resources offer plans, some specifically designed for educational settings. Check with woodworking supply stores, online plan providers, and educational material suppliers. You might also find plans in books dedicated to boat building.

    Q: What type of wood is best for a school project?

    A: Consider readily available, affordable, and easy-to-work-with woods like pine or fir. Avoid overly hard or brittle woods that might pose safety risks for students.

    Q: How much time will the project take?

    A: This varies greatly depending on the complexity of the plan, the skill level of the participants, and the time allocated. Some simple projects might take weeks, while more complex ones could require months.

    Q: What tools will I need?

    A: The necessary tools will depend on the specific plans, but generally expect to need saws (hand saws, circular saws), chisels, hammers, measuring tools, clamps, and various woodworking hand tools.

    So, what are you waiting for? Dive in and experience the joy of building a timber boat with your students or fellow enthusiasts! It's an adventure you won't regret.

    Read More..

    How to Build a Boat Using Stitch and Glue Method for Freshwater and Saltwater Use

    How to Build a Boat Using Stitch and Glue Method for Freshwater and Saltwater Use

    Building Your Own Boat: A Stitch-and-Glue Guide for Fresh and Saltwater

    Hey there, fellow boat enthusiasts! Thinking about building your own boat? The stitch-and-glue method is a fantastic way to get started, even if you're a beginner. It's surprisingly accessible, relatively inexpensive, and lets you build a strong, beautiful boat for both freshwater lakes and salty seas. Let's dive in!

    Choosing Your Plans and Materials

    First things first: you need plans! There are tons of free and paid plans available online and in books. Look for designs suited to your skill level and intended use. Don't start with something too ambitious â€" a simple kayak or small dinghy is a great starting point.

    Wood Selection: What to Use

    For stitch-and-glue, you'll primarily be using thin strips of wood, often marine-grade plywood. Marine plywood is crucial because it's treated to resist rot and water damage, essential for both freshwater and saltwater use. Consider the thickness â€" thinner plywood is lighter but requires more careful handling.

    Epoxy and Cloth: The Glue That Holds It All Together

    Epoxy resin is the heart of the stitch-and-glue process. It's a strong, waterproof adhesive that bonds the wood strips and provides a watertight hull. You'll also need fiberglass cloth or another suitable fabric to reinforce the epoxy bond. Make sure you get the right type of epoxy for your project â€" some are better suited for marine use.

    The Stitch-and-Glue Process: Step-by-Step

    Okay, let's get our hands dirty!

    Step 1: Preparing the Wood

    Cut your plywood strips according to your plans. Pay close attention to the dimensions â€" accuracy is key! Sand the edges smooth for a clean finish and better adhesion.

    Step 2: Stitching the Hull

    This is where the "stitch" part comes in. Using a pattern, you'll temporarily stitch the wood strips together using staples or wire. Don't worry, these stitches are temporary! They'll hold the shape while you apply the epoxy.

    Step 3: Applying the Epoxy

    Carefully apply epoxy to the seams between the wood strips, ensuring thorough coverage. Then, lay the fiberglass cloth over the epoxy, pressing it firmly into the seams to saturate it with the resin. This creates a strong, waterproof layer.

    Step 4: Removing the Stitches

    Once the epoxy has cured (fully hardened â€" check your epoxy's instructions!), carefully remove the temporary stitches. You’ll be left with a solid, epoxy-bonded hull.

    Step 5: Finishing Touches

    Sand down any rough edges and imperfections, and then apply a finish coat. Consider using a marine-grade varnish or paint to protect the wood and add some aesthetic flair.

    Considerations for Saltwater Use

    Building a boat for saltwater requires extra attention to detail. Marine-grade materials are non-negotiable. Regularly inspect your boat for any signs of damage or wear. Consider using additional sealant around joints and fasteners to further protect against saltwater intrusion.

    Commonly Asked Questions

    • How long does it take to build a stitch-and-glue boat? This depends on the size and complexity of the boat, as well as your experience level. Expect it to take anywhere from a few weeks to several months.
    • Is stitch-and-glue suitable for beginners? Absolutely! It's a great method for beginners due to its relative simplicity and forgiving nature.
    • What tools do I need? You'll need basic woodworking tools like saws, drills, clamps, and sanding tools. Specific tools will vary depending on the boat design.
    • How much does it cost? The cost varies considerably, depending on the size of the boat and the materials you choose. It is generally much cheaper than buying a pre-made boat.
    • Can I build a larger boat using this method? Yes, but larger boats require more planning and skill. Start small and work your way up.
    So, there you have it! Building your own boat using the stitch-and-glue method is a rewarding experience. With careful planning, attention to detail, and a bit of patience, you can create a beautiful and functional boat for years of enjoyment on the water. Happy building!
    Read More..

    Crafting a Classic Wooden Boat: Best Plans to Follow

    Crafting a Classic Wooden Boat: Best Plans to Follow

    Crafting a Classic Wooden Boat: Choosing the Right Plans

    So, you're dreaming of building your own classic wooden boat? That's fantastic! It's a challenging but incredibly rewarding project. Choosing the right plans is the crucial first step. Let's navigate the options together.

    Finding the Perfect Plans: Where to Start

    The internet is a goldmine, but it can also be overwhelming. You'll find everything from free, questionable plans to professionally designed sets costing hundreds (or even thousands) of dollars. Consider these sources:

    Online Resources and Plan Providers

    Websites dedicated to boat building often host plan collections. Look for sites with reviews and user feedback. Some offer digital downloads, while others sell physical copies. Pay close attention to the level of detail â€" blueprints should be clear, well-labeled, and comprehensive.

    Books and Publications

    Classic boat building books are invaluable. They often include plans alongside detailed instructions and historical context. This can be particularly helpful for understanding the nuances of traditional construction techniques.

    Boatbuilding Associations and Clubs

    Joining a local boatbuilding club or association opens doors to a wealth of experience. Members often share plans, offer advice, and provide mentorship. It's a great way to network and learn from seasoned builders.

    Key Factors to Consider When Choosing Plans

    Don't just grab the first set of plans you find! Carefully evaluate your skills and resources.

    Your Skill Level

    Honesty is key here. Are you a seasoned woodworker, or a beginner? Choose plans that match your capabilities. Starting with a simpler design is always a good idea if you're new to boatbuilding. A complex design might lead to frustration and a half-finished project.

    The Boat's Size and Complexity

    Smaller boats are generally easier to manage, both during construction and once launched. Consider the space you have available for building and storage. A larger boat requires more time, materials, and potentially specialized tools.

    Material Specifications

    The plans should clearly specify the types and quantities of wood required. Consider the availability and cost of these materials in your area. Some woods are more expensive and difficult to source than others.

    Construction Techniques

    Familiarize yourself with the construction techniques outlined in the plans. Are they methods you're comfortable with, or will you need to learn new skills? Don't underestimate the importance of this aspect!

    Popular Classic Boat Designs

    Many excellent designs are available. Some popular choices among hobbyists include:

    • Dories: Simple, versatile, and relatively easy to build.
    • Rowboats: Classic and elegant, suitable for both beginners and experienced builders.
    • Small Sailboats: More challenging, but offer the reward of sailing your own creation.
    • Punt Boats: Flat-bottomed boats ideal for shallow water, often built using simple techniques.

    Remember, the best plans are the ones that best suit your skills, resources, and aspirations. Don't rush the decision. Research thoroughly, ask questions, and choose wisely!

    Frequently Asked Questions

    Here are some common questions that pop up when choosing boat building plans:

    • Q: Are free plans reliable? A: Proceed with caution. Free plans often lack detail and may contain errors. It's safer to invest in professionally designed plans.
    • Q: How much should I expect to spend on plans? A: Prices vary greatly depending on the boat's size and complexity. Expect to pay anywhere from a few tens to several hundreds of dollars.
    • Q: What if I get stuck during construction? A: Join a boatbuilding club or forum! Experienced builders are often happy to offer guidance and support.
    • Q: Do I need special tools? A: The specific tools needed will depend on the plans, but you'll likely require basic woodworking tools and some specialized boatbuilding tools.
    Read More..

    Step-by-Step Guide for Building a Wooden Rowboat from Plans

    Friday, November 22, 2024

    Step-by-Step Guide for Building a Wooden Rowboat from Plans

    Building a Wooden Rowboat from Plans: A Comprehensive Guide

    Embarking on the journey of building a wooden rowboat from plans is a rewarding experience that blends craftsmanship, patience, and a deep appreciation for the beauty of natural materials. This comprehensive guide will walk you through each stage of the process, from selecting the right plans to launching your handcrafted masterpiece.

    1. Selecting the Right Plans

    The foundation of your rowboat lies in the plans you choose. It is essential to select plans that align with your skill level, available resources, and desired boat characteristics. Here's what to consider:

    1.1 Boat Type and Size

    Decide on the type of rowboat you envision. Popular options include:

    • Dinghy: Compact and lightweight, suitable for short trips and recreational use.
    • Skiff: A versatile option for fishing, rowing, or sailing.
    • Punt: Shallow-draft design ideal for navigating shallow waters.
    • Gundalow: Traditional flat-bottomed boat with ample cargo capacity.

    Consider the intended use of your rowboat. Are you planning leisurely outings, fishing expeditions, or a combination of activities? This will determine the optimal size and design features.

    1.2 Skill Level

    Plans are available for various skill levels. Beginners may opt for simpler designs with straightforward construction techniques. Experienced boatbuilders can explore more intricate plans that involve advanced joinery and techniques.

    1.3 Material and Construction Method

    Plans will specify the type of wood, hardware, and construction methods required. Ensure that you have access to the necessary materials and that you are comfortable with the recommended techniques.

    1.4 Availability of Plans

    Look for reputable sources for rowboat plans, such as books, magazines, online marketplaces, or specialized boatbuilding suppliers. Review the plans carefully to assess their clarity, comprehensiveness, and accuracy.

    2. Gathering Materials and Tools

    Once you have chosen your plans, it's time to gather the necessary materials and tools. The list will vary depending on the specific plans and your chosen construction methods, but here are some common items:

    2.1 Wood

    The plans will specify the type of wood for different parts of the boat. Common choices include:

    • Cedar: Lightweight, strong, and resistant to rot.
    • Mahogany: Durable, attractive, and easy to work with.
    • Oak: Sturdy and water-resistant, but heavier than cedar.
    • Pine: Affordable and readily available, but less durable than hardwoods.

    Ensure that the wood is kiln-dried, free of knots, and has a consistent grain pattern.

    2.2 Hardware

    Hardware includes fittings, fasteners, and other components required for the boat's construction. Common hardware includes:

    • Fasteners: Screws, nails, bolts, and rivets.
    • Oars: Wooden or aluminum, matching the boat's length and design.
    • Rowlocks: Metal fittings that attach to the oars.
    • Thwarts: Seats for the rower.
    • Keel: The backbone of the boat, providing longitudinal support.

    2.3 Tools

    You will need a range of tools for building your rowboat, including:

    • Saw: Hand saw, circular saw, or table saw.
    • Plane: Hand plane or power plane.
    • Chisels: For shaping and carving wood.
    • Hammer: For driving nails and fasteners.
    • Screwdriver: For driving screws.
    • Drill: For drilling holes for fasteners.
    • Sandpaper: Various grits for smoothing surfaces.
    • Measuring tools: Tape measure, ruler, and protractor.
    • Clamps: For holding wood pieces together.

    3. Preparing the Work Area

    Before you begin construction, ensure you have a safe and well-equipped workspace. Here's what to consider:

    3.1 Adequate Space

    You will need enough space to accommodate the size of the boat and the tools you will be using. Ideally, a dedicated workshop or a garage with ample clearance is ideal.

    3.2 Lighting

    Good lighting is crucial for accurate measurements and precise work. Install sufficient overhead lighting and use task lamps where needed.

    3.3 Workbenches

    Sturdy workbenches are essential for supporting the weight of the boat and providing a stable platform for cutting and assembling components.

    3.4 Safety Equipment

    Safety is paramount in any woodworking project. Wear safety goggles, dust masks, and ear protection. Keep a first-aid kit readily available.

    4. Boat Construction: A Step-by-Step Guide

    The construction process will vary depending on the specific plans and methods you choose. However, the general sequence of steps includes:

    4.1 Cutting and Shaping Components

    Following the plans, carefully cut and shape the wooden components of the boat. Pay close attention to the dimensions and angles specified.

    4.2 Assembling the Hull

    The hull is the primary structure of the boat. Assemble the hull planks, ribs, and keel according to the plan's instructions. Use the chosen joinery techniques to create strong and watertight connections.

    4.3 Adding Decks and Transom

    Attach the decks, transom, and other structural elements as specified by the plans. Ensure these components are properly aligned and secured.

    4.4 Installing Thwarts and Rowlocks

    Position the thwarts (seats) and rowlocks (oar fittings) according to the plans. Ensure that they are secure and provide comfortable rowing positions.

    4.5 Finishing Touches

    Once the boat is assembled, apply finishing touches to enhance its aesthetics and longevity. This may include sanding, painting, varnishing, or adding decorative elements.

    5. Launching and Testing

    Once the boat is complete, it's time for the exciting moment of launching. Follow these steps:

    5.1 Launching Preparations

    Choose a calm and suitable body of water for the first launch. Ensure that the boat is properly balanced and that all necessary equipment is on board.

    5.2 Launching the Boat

    Gently lower the boat into the water, ensuring it floats level and stable.

    5.3 Testing and Adjustments

    Once the boat is in the water, test its stability, maneuverability, and overall performance. Make any necessary adjustments to the boat's design or trim.

    6. Maintenance and Care

    Proper maintenance is essential to preserve the longevity of your wooden rowboat. Here are some key steps:

    6.1 Regular Cleaning

    Clean the boat after each use, removing dirt, debris, and saltwater. Use fresh water to rinse the hull and deck.

    6.2 Drying and Storage

    Allow the boat to dry thoroughly after cleaning, especially in humid environments. Store the boat in a dry and well-ventilated location.

    6.3 Applying Protective Coatings

    Apply protective coatings to the boat's hull and deck, such as varnish or marine paint, to prevent water damage and rot.

    6.4 Inspection and Repair

    Periodically inspect the boat for signs of wear, tear, or damage. Repair any issues promptly to prevent further deterioration.

    Conclusion

    Building a wooden rowboat from plans is a rewarding project that combines skill, passion, and an appreciation for traditional craftsmanship. With careful planning, meticulous construction, and proper maintenance, your handcrafted rowboat will provide countless hours of enjoyment on the water.

    Read More..

    Wooden Sailboat Plans for a Family-Friendly Sailboat

    Wooden Sailboat Plans for a Family-Friendly Sailboat

    Building Your Own Family-Friendly Wooden Sailboat: A DIY Dream Come True

    Building a wooden sailboat can be a truly rewarding experience, especially when you're creating a vessel for family adventures. The smell of fresh wood, the satisfaction of seeing your design come to life, and the joy of sailing with loved ones â€" it's a combination that's hard to beat! But before you dive into the world of wooden boat construction, let's chat about what makes a good family-friendly sailboat and how you can build one that's safe, comfortable, and perfect for making memories.

    Choosing the Right Design

    The first step is to select a design that fits your family's needs and your building skills. There are tons of plans available, both free and paid, so you can find something that matches your vision. Here are some key factors to consider:

    Size and Capacity

    Think about how many people you'll be sailing with, and how much gear you'll need to carry. A smaller sailboat is easier to handle and cheaper to build, but it might not be ideal for a large family. Bigger boats offer more space and stability but can be more challenging to construct and manage. You'll also want to consider the weight of your passengers and equipment, as this will affect how much sail area you'll need for good performance.

    Type of Sailboat

    There are many different types of sailboats, each with its own advantages and disadvantages. Here are a few popular choices:

    • Day Sailers: These are perfect for short trips and weekend adventures. They're often smaller and simpler to build.
    • Cruisers: These are designed for longer voyages and offer more living space and amenities. They're larger and more complex to build.
    • Dinghies: These small, lightweight boats are perfect for exploring shallow waters and maneuvering in tight spaces. They're relatively easy to build and can be stored on a trailer.
    • Catamarans: These boats have two hulls, which provides excellent stability and more living space. They can be more challenging to build than monohulls.

    Sailing Style

    Do you prefer relaxed cruising or more competitive sailing? Consider how you plan to use your sailboat. For casual cruising, a slower and more forgiving design might be ideal. If you're looking for speed and excitement, you'll need a boat that's designed for performance.

    Planning for Safety and Comfort

    Your family's safety and comfort should be top priorities. Here are some features to consider:

    Stability and Floatation

    Choose a design that's known for its stability. You might also consider adding extra floatation to your sailboat, especially if you'll be sailing with young children. A well-designed boat with plenty of freeboard (the distance between the waterline and the deck) will help you feel more confident in choppy waters.

    Open Cockpit

    An open cockpit allows for easier movement and better visibility. It's also a great way to keep everyone connected and enjoying the scenery. You can add a bimini top or spray dodger for sun protection and weather protection.

    Comfortable Seating and Storage

    Make sure your sailboat has plenty of comfortable seating for everyone. Consider adding a cushioned bench seat or even a small table for snack breaks and enjoying the view. You'll also want to think about storage space for gear, food, and supplies. Having well-organized storage can keep your boat tidy and make your sailing trips more enjoyable.

    Building Your Wooden Sailboat: The Steps

    Now that you've chosen a design and planned for safety, it's time to dive into the building process. Here's a general overview:

    Gathering Materials and Tools

    You'll need to choose the right wood for your project. Marine plywood is a popular choice for its strength and resistance to moisture. Other common woods include cedar, mahogany, and oak. You'll also need a variety of tools, including:

    • Saw
    • Drill
    • Sandpaper
    • Clamps
    • Measuring tape
    • Epoxy
    • Fiberglass cloth
    • Paint or varnish

    Following the Plans

    Your boat plans will provide detailed instructions and diagrams. Take your time, follow each step carefully, and don't hesitate to ask for help if you're unsure about anything. Accuracy is key, so take your time and double-check your measurements.

    Building the Hull

    The hull is the heart of your sailboat. It's what gives the boat its shape and buoyancy. Start by building the frames, then attach the planks to create the shell of the hull. Make sure to use epoxy and fiberglass to seal and strengthen the hull.

    Constructing the Deck

    The deck is the top part of the boat and provides a walking surface. You can use similar materials and techniques to build the deck as you did for the hull. Add handrails and cleats for safety and to make it easier to move around.

    Installing the Rigging

    Rigging is the system of ropes and wires that control the sails. You'll need to install the mast, boom, and other rigging components according to your plans. Make sure to use high-quality materials and consult with a sailing expert if you're unsure about anything.

    Finishing Touches

    Once the main construction is complete, it's time for the finishing touches. This includes sanding, painting or varnishing, and installing any additional equipment, like a compass, navigation lights, and a radio. Take your time and make your sailboat truly unique!

    Enjoying Your Family-Friendly Wooden Sailboat

    Building a wooden sailboat is a journey, not just a project. You'll learn new skills, meet other boat builders, and create a bond with your family that will last a lifetime. Once your boat is complete, get out there and enjoy all the adventures that await!

    Commonly Asked Questions

    How much does it cost to build a wooden sailboat?

    The cost of building a wooden sailboat can vary widely, depending on the size, design, and materials you choose. You can expect to spend anywhere from a few thousand dollars to tens of thousands of dollars.

    How long does it take to build a wooden sailboat?

    The construction time also depends on the boat's size and complexity, as well as your experience level. A smaller boat can be built in a few months, while a larger boat may take several years.

    Do I need any special skills to build a wooden sailboat?

    Basic woodworking skills are helpful, but you can learn as you go. There are many resources available to help you, including books, online tutorials, and woodworking classes.

    Is it safe to sail a boat I built myself?

    Yes, it's absolutely safe to sail a boat you built yourself, as long as you carefully follow the plans and use high-quality materials. Before you take your boat out on the water, it's a good idea to have it inspected by a qualified marine surveyor.

    Remember, building a wooden sailboat is an adventure in itself! It's a chance to learn, grow, and create something special with your family. So dive in, enjoy the process, and get ready to set sail on a journey of a lifetime!

    Read More..

    How to Build a Lightweight Duck Boat with Simple Wood Plans

    How to Build a Lightweight Duck Boat with Simple Wood Plans

    Building a Lightweight Duck Boat with Simple Wood Plans

    A duck boat is a versatile vessel, ideal for navigating shallow waters, traversing marshes, and providing a stable platform for hunting waterfowl. While commercially manufactured duck boats are readily available, constructing one from scratch offers a rewarding experience and allows for customization to perfectly suit your needs. This article will guide you through building a lightweight duck boat using simple wood plans, equipping you with the knowledge and steps to embark on your own woodworking adventure.

    Materials and Tools

    Before diving into construction, ensure you have the necessary materials and tools. This list includes:

    Materials:

    • Plywood (Marine Grade): 1/4” or 3/8” thick. Choose a waterproof and durable plywood for optimal longevity.
    • Lumber (Cedar or Redwood): Select lightweight and rot-resistant wood for the frame, gunwales, and seats.
    • Epoxy Resin and Hardener:
    • Fiberglass Cloth:
    • Wood Screws:
    • Marine-Grade Fasteners:
    • Paint (Optional): For protection and aesthetics, consider a durable paint.
    • Duck Boat Plans: Obtain detailed blueprints outlining the dimensions, angles, and layout of the boat.

    Tools:

    • Circular Saw:
    • Jigsaw:
    • Drill:
    • Sandpaper (Various grits):
    • Clamps:
    • Measuring Tape:
    • Level:
    • Safety Glasses:
    • Work Gloves:
    • Dust Mask:

    Step-by-Step Construction Guide

    The following steps provide a detailed guide to building your duck boat:

    Step 1: Assemble the Frame

    • Using the plans as your guide, cut the lumber to the specified lengths for the boat’s frame. This includes the keel, ribs, and transom.
    • Join the frame pieces together using wood screws and epoxy, ensuring tight and secure connections. Use clamps to hold the frame in place during the curing process.

    Step 2: Construct the Hull

    • Cut the plywood panels to match the hull shape outlined in the plans. Use a circular saw or jigsaw for precise cuts.
    • Attach the plywood panels to the frame using screws and epoxy, ensuring a watertight seal. For added strength, use fiberglass cloth and epoxy to reinforce the hull.

    Step 3: Create the Gunwales and Seats

    • Cut the lumber for the gunwales and seats to the specified dimensions. These elements provide strength and structure to the boat, as well as comfortable seating.
    • Attach the gunwales to the hull using screws and epoxy. Ensure they are level and securely fastened. Construct the seats using the same method.

    Step 4: Build the Bow and Stern

    • Construct the bow and stern by shaping plywood panels and attaching them to the frame using screws and epoxy.
    • Ensure the bow and stern are properly aligned with the rest of the hull, creating a streamlined and functional design.

    Step 5: Add Finishing Touches

    • Once the boat is fully assembled, sand the surfaces to a smooth finish. This eliminates any rough edges and prepares the boat for paint or varnish.
    • Apply a layer of epoxy resin and fiberglass cloth to seal the boat and enhance its durability. This also adds a protective layer against water damage.
    • Paint or varnish the boat according to your preference. Use a durable marine-grade paint to protect the wood and enhance its aesthetics.

    Tips for Building a Lightweight Duck Boat

    Consider these additional tips for building a lightweight and durable duck boat:

    • Choose Lightweight Materials: Opt for cedar or redwood for the frame and plywood for the hull. These materials provide strength while minimizing weight.
    • Minimize Weight: Avoid using thick pieces of lumber. Consider using thinner boards for the frame and hull to reduce overall weight.
    • Use Proper Fasteners: Choose marine-grade fasteners for all connections, ensuring they are resistant to corrosion and capable of withstanding the harsh conditions of water exposure.
    • Add a Motor Mount: Include a motor mount to accommodate a small outboard motor. This allows for increased speed and maneuverability while navigating open water.
    • Consider a Drain Plug: Installing a drain plug helps remove water that may accumulate inside the boat, preventing rot and decay.

    Safety Considerations

    Remember to prioritize safety during the construction process:

    • Wear Protective Gear: Always use safety glasses, work gloves, and a dust mask to protect yourself from potential hazards.
    • Use Sharp Tools Safely: Handle power tools and sharp objects with caution to prevent accidents.
    • Follow Instructions: Adhere to the instructions provided with the plans and materials. This ensures proper construction and safety.
    • Test the Boat Thoroughly: Before taking the boat out on the water, test it thoroughly to ensure stability and watertightness.

    Conclusion

    Building a lightweight duck boat using simple wood plans is a rewarding project that allows you to create a customized and durable vessel for your hunting adventures. By following the detailed instructions and incorporating the tips provided, you can embark on your own woodworking journey and achieve a satisfying outcome. Remember to prioritize safety throughout the process and enjoy the satisfaction of crafting your own duck boat from scratch.

    Read More..

    Wooden Duck Boat Plans for Maximum Camouflage and Stability

    Wooden Duck Boat Plans for Maximum Camouflage and Stability

    Wooden Duck Boat Plans for Maximum Camouflage and Stability

    Duck hunting is a beloved pastime for many, and having the right equipment is crucial for success. A well-built duck boat, designed for both stability and camouflage, can make the difference between a fruitful hunt and a disappointing outing. This article delves into the details of constructing a wooden duck boat that excels in both these critical areas.

    Choosing the Right Wood for Maximum Durability

    The foundation of any sturdy boat lies in the quality of its wood. For a duck boat, durability is paramount, as it will encounter harsh weather conditions and potential impacts. Several woods stand out for their strength and resistance to rot:

    Cedar

    Known for its natural resistance to decay and insects, cedar is an excellent choice for the hull. It is lightweight, making it easier to maneuver, yet strong enough to withstand the rigors of duck hunting.

    Redwood

    Redwood shares cedar's resistance to rot and insects, boasting exceptional strength and durability. Its natural reddish-brown color adds a touch of elegance to the boat, though it may require additional camouflage treatment.

    Mahogany

    Although more expensive than cedar and redwood, mahogany is highly prized for its strength, beauty, and resistance to warping. It is often used for boat decks and trim due to its excellent finish.

    Constructing the Hull for Unshakable Stability

    The hull design is crucial for a stable duck boat. A wide, flat bottom provides exceptional stability, while a shallow draft enables easy navigation in shallow waters.

    Planking and Framing

    The hull is constructed using planks that are fastened to a frame made of sturdy ribs and stringers. Use marine-grade plywood for the planking, ensuring watertight seals. For the frame, select hardwoods like oak or ash for their strength.

    Keel and Chine Logs

    The keel runs along the bottom of the hull, providing longitudinal strength. Chine logs run along the sides of the hull, contributing to its stability. These components should be made from thick, durable wood, such as oak or mahogany.

    Stem and Stern

    The stem is the forward end of the hull, while the stern is the rear end. These elements should be sturdy and well-shaped to provide structural integrity and proper water flow.

    Camouflaging Your Duck Boat: Blending into the Environment

    Effective camouflage is essential for a successful duck hunt. A well-camouflaged boat allows hunters to approach ducks without spooking them, increasing their chances of a successful hunt. Here are key strategies for camouflage:

    Paint and Materials

    Use flat, non-reflective paint in earth tones that match the surrounding environment. Popular choices include browns, greens, and grays. Consider using camouflage patterns like Realtree or Mossy Oak for added concealment.

    Natural Cover

    Integrate natural elements into your camouflage. Attach brush, reeds, or grasses to the boat to create a natural look and break up your silhouette. These elements should be securely fastened to prevent them from becoming detached.

    Strategic Placement

    Avoid placing your boat in areas that lack natural camouflage, like open water or bright shores. Aim for areas with reeds, brush, or emergent vegetation to blend in seamlessly.

    Adding Essential Features for a Successful Duck Hunt

    Beyond stability and camouflage, a well-designed duck boat includes features that enhance the hunting experience.

    Deck and Seating

    A sturdy deck provides a stable platform for hunting and movement. The deck should be wide enough for comfortable seating and hunting gear. Choose durable materials like marine-grade plywood or treated lumber.

    Storage Compartments

    Include storage compartments to keep hunting gear organized and accessible. These can be built into the deck or side panels. Ensure they are sealed to prevent water ingress.

    Motor Mount

    If you plan to use a motor, incorporate a sturdy motor mount. The mount should be secured to the transom and designed for the size and type of motor you will be using.

    Safety Considerations: Ensuring a Safe and Enjoyable Hunting Experience

    Duck hunting can be a dangerous activity, so safety is paramount. These precautions are crucial:

  • Wear a life jacket at all times.
  • Inspect the boat thoroughly before each trip.
  • Be aware of weather conditions and avoid hunting in unsafe conditions.
  • Carry a first-aid kit and other safety equipment.
  • Hunt with a buddy and inform someone on shore about your hunting plans.
  • Conclusion: Constructing a Duck Boat for Success

    Building a wooden duck boat requires careful planning and meticulous craftsmanship. By following these guidelines, you can construct a stable, well-camouflaged boat that enhances your duck hunting experience. Remember that safety is paramount. Always prioritize safety while navigating the waters and enjoying the thrill of duck hunting.

    Read More..

    Build a Simple Plywood Boat with Basic Tools

    Build a Simple Plywood Boat with Basic Tools

    Building a Simple Plywood Boat with Basic Tools

    Dreaming of gliding across the water in a boat you built yourself? It's not as daunting as it seems! With basic tools and a little ingenuity, you can construct a simple, functional plywood boat that's perfect for leisurely paddles or fishing trips. Let's dive into the process, step by step.

    Gathering Your Materials

    Before you start cutting and assembling, gather your materials. You'll need:

    • Plywood: Choose marine-grade plywood for its durability and water resistance. A 1/4-inch thickness is suitable for smaller boats.
    • Boat Plans: Start with simple, beginner-friendly plans. Online resources and woodworking books offer a variety of options.
    • Epoxy Resin and Hardener: This will seal the wood and protect it from water damage.
    • Wood Glue: For securing the plywood panels.
    • Screws: Use stainless steel screws for long-lasting durability.
    • Paint or Varnish: To protect the wood and add a personal touch.
    • Oars or Paddles: For propelling your boat.
    • Safety Gear: Don't forget life jackets and other safety equipment!

    Preparing the Plywood

    Once you have your plywood, it's time to cut it to size. Carefully follow the instructions on your boat plans, using a jigsaw or circular saw. Ensure you make clean, precise cuts to ensure your boat is watertight.

    Marking and Cutting

    Use a pencil to carefully transfer the dimensions from the boat plans onto the plywood. Double-check your measurements to ensure accuracy. Then, slowly and carefully cut out the shapes using your chosen saw. If you're using a jigsaw, work slowly and smoothly to avoid splintering the edges.

    Assembly

    Now comes the exciting part â€" building your boat! Start by joining the plywood panels together using wood glue and screws. Use a clamp to hold the pieces in place until the glue dries. Ensure you use a sufficient number of screws and that they are countersunk so they don't protrude.

    Securing the Bottom

    The bottom of your boat is crucial for stability. Connect the bottom panels to the sides using glue and screws. Make sure the joints are tight and flush to create a strong, watertight base.

    Finishing Touches

    With the basic structure complete, it's time to add the finishing touches. Apply a generous coat of epoxy resin and hardener to all seams and surfaces. Let it cure thoroughly according to the manufacturer's instructions. This will ensure your boat is watertight and protected from the elements.

    Paint or Varnish

    Once the epoxy has cured, you can paint or varnish your boat. Choose colors and finishes that reflect your personal style. Several coats will provide the best protection and aesthetic appeal.

    Launching Day

    The moment you've been waiting for has arrived! Carefully transport your newly built boat to the water. Take a moment to admire your handiwork, then climb in and enjoy a leisurely paddle. You've built your own boat! Congratulations.

    Read More..

    How to Build a Wooden Kayak: Complete Guide

    How to Build a Wooden Kayak: Complete Guide

    Building a Wooden Kayak: A Complete Guide

    Hey there, fellow water enthusiasts! Are you looking to take your paddling adventures to a whole new level? Building your own wooden kayak is a rewarding journey that combines woodworking skills with a touch of artistry. It's a chance to create something truly unique and personal, a vessel that reflects your own design and craftsmanship. So, grab your tools, get comfy, and let's dive into this exciting project!

    Choosing Your Design and Materials

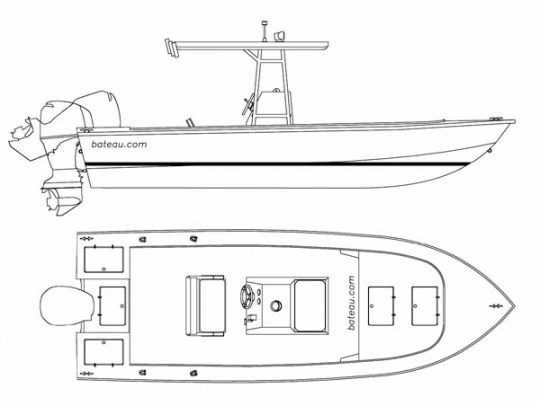
    The first step in this adventure is picking the perfect kayak design. There are countless plans available online and in books, each offering its own unique characteristics and skill level. Consider the type of paddling you'll do, your experience level, and your preferred style. For beginners, a simple, traditional design like a Greenland kayak might be a good choice. More experienced builders might enjoy tackling a more challenging design, like a sea kayak with intricate curves.

    Once you've settled on a design, you'll need to choose your wood. Some popular choices include:

    • Cedar: Lightweight, rot-resistant, and beautiful with its natural red hue.
    • Spruce: Strong and flexible, ideal for ribs and stringers.
    • Oak: Durable and heavy, perfect for keel and stem.
    • Mahogany: Elegant and luxurious, but also expensive.

    The type of wood you choose will depend on your budget, the design, and your personal preferences. It's always a good idea to consult with experienced woodworkers or boat builders to get advice on choosing the right materials for your project.

    Gathering Your Tools and Supplies

    Building a wooden kayak requires a decent collection of tools. Here's a basic list to get you started:

    • Hand saw: For cutting wood to size.
    • Band saw: For intricate cuts and curves.
    • Router: For shaping and smoothing edges.
    • Sandpaper: Various grits for achieving a smooth finish.
    • Clamps: For holding pieces together while gluing.
    • Drill press: For drilling holes and creating mortise and tenon joints.
    • Epoxy resin: For bonding wood pieces together.
    • Fiberglass cloth: For adding strength and waterproofing.
    • Paint or varnish: For a protective finish.

    This list is just a starting point. The specific tools you'll need will depend on the design and your personal preferences. Don't be afraid to ask for help or advice from experienced boat builders or woodworkers, they can help you choose the right tools for the job.

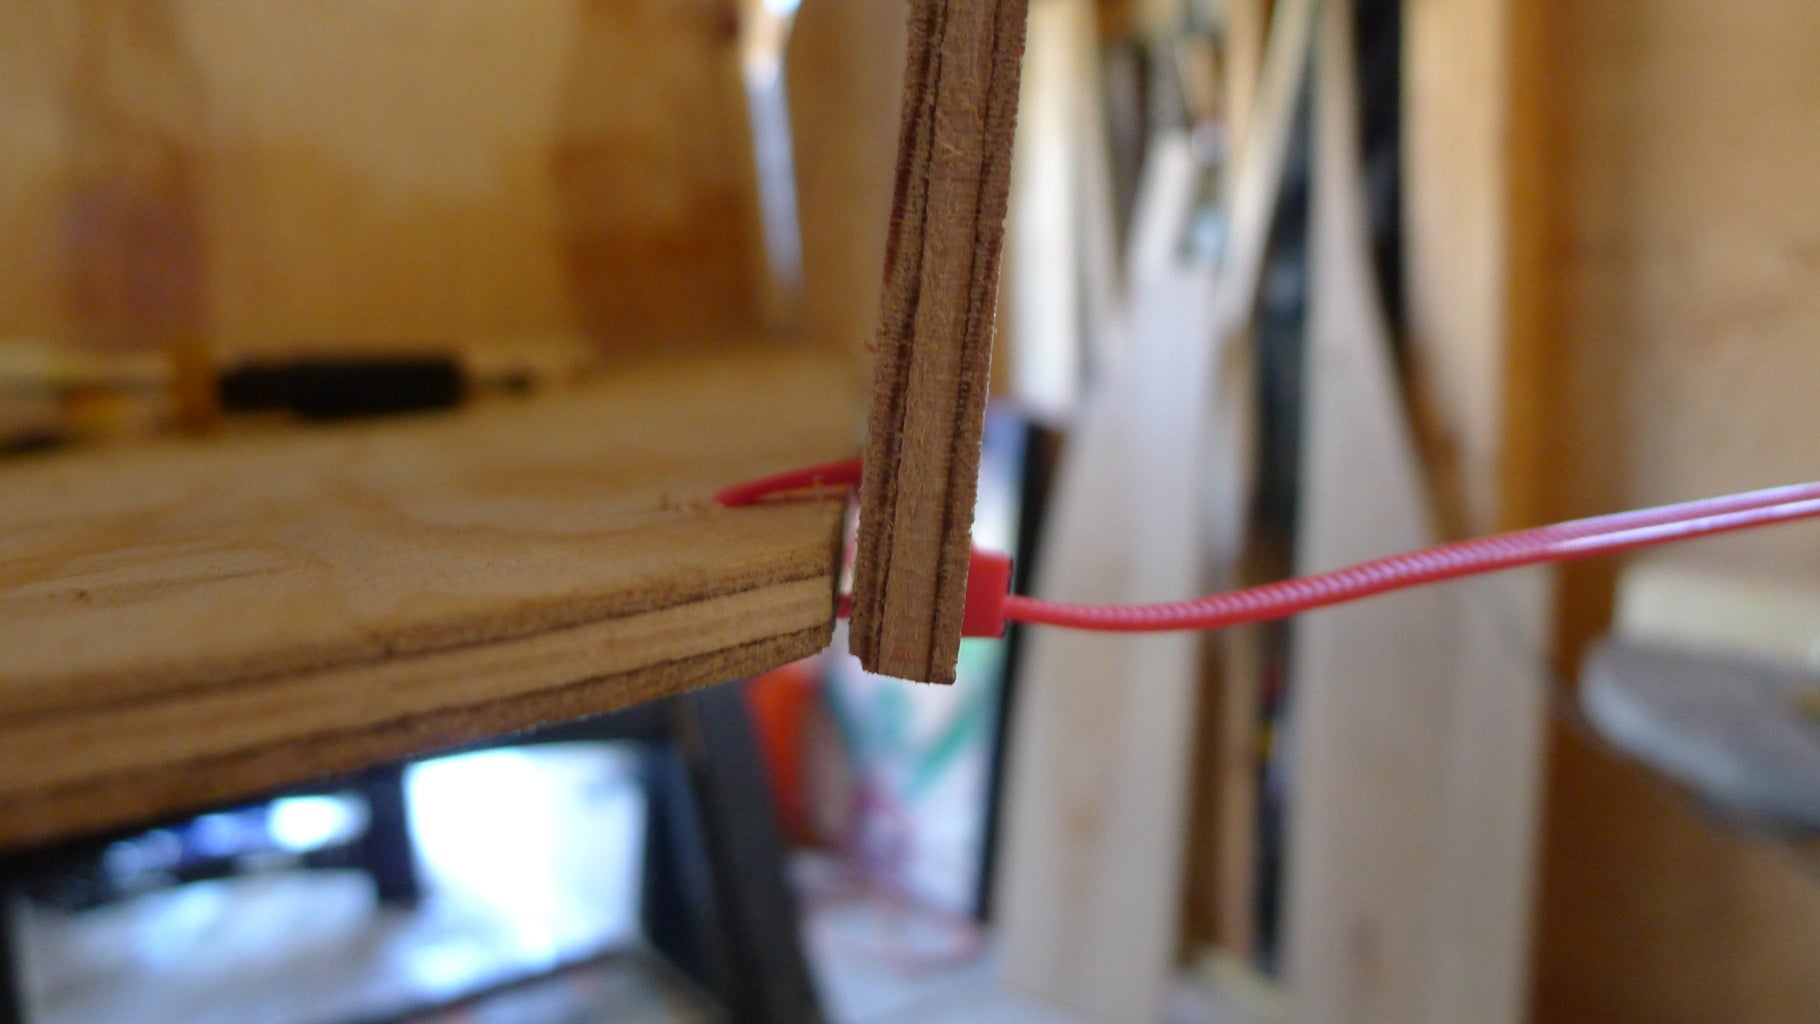
    Building the Framework: The Skeleton of Your Kayak

    The framework, or skeleton, of your kayak is crucial for its shape and strength. It's built from the keel, stem, ribs, and stringers. Each piece is carefully cut and fitted together, creating a robust structure that will support the hull.

    Laying the Keel

    The keel is the backbone of your kayak, running along the center line of the hull. It's typically made from a strong hardwood like oak. Start by laying out the keel on your workbench and shaping its profile according to your design plans. Pay close attention to the curves and angles of the keel, ensuring it matches the plans precisely.

    Joining the Stems

    The stems, located at the bow and stern of the kayak, connect to the keel and provide a strong attachment point for the hull. Use strong adhesives and clamps to join the stems to the keel, creating a sturdy base for the framework.

    Constructing the Ribs

    The ribs, usually made from spruce or cedar, provide the curved shape of the hull. They are spaced evenly along the keel and attached to the stems. Carefully cut each rib to match the curvature of the hull, ensuring they all fit smoothly against the keel and stems. Use mortise and tenon joints or other joinery techniques to securely attach the ribs to the framework.

    Adding the Stringers

    Stringers, also known as longitudinals, run along the length of the hull and provide additional strength and support. They are attached to the ribs, adding stability and helping to maintain the overall shape of the kayak. Carefully measure and cut the stringers to match the shape of the hull, ensuring they are correctly placed and securely attached to the ribs.

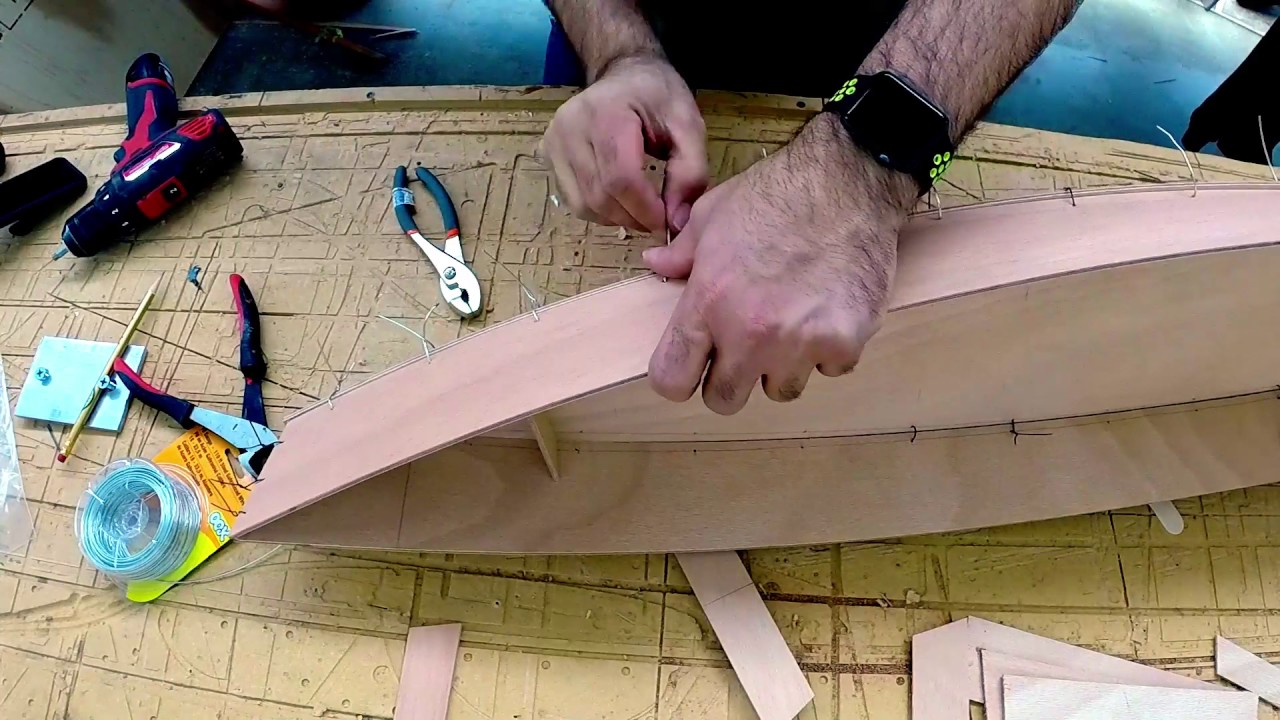
    Creating the Hull: Shaping and Planking

    With the framework complete, it's time to build the hull, the outer shell of your kayak. This involves shaping the planking, which are thin strips of wood that cover the framework, creating the smooth and watertight hull.

    Planking the Hull

    Planking is often done in strips, starting with the bottom and working your way up the sides. Use a combination of hand tools and power tools to carefully shape and fit the planking to the framework. Each plank should be meticulously cut to the curve of the hull, ensuring a smooth transition from one plank to the next. Secure the planking to the framework with strong adhesives and clamps.

    Fine-Tuning the Hull

    Once the planking is in place, use a router and sandpaper to smooth and shape the hull to achieve the desired profile. Carefully sand away any bumps or irregularities, creating a smooth and seamless surface for the final finish.

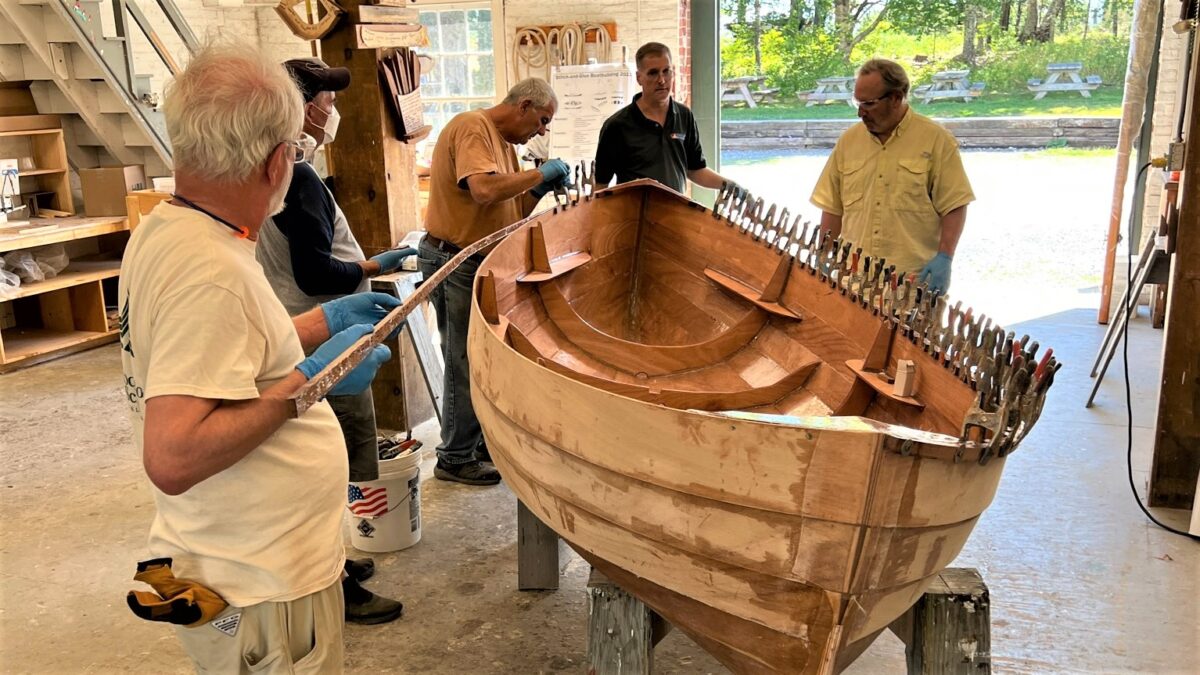
    Adding Strength and Waterproofing

    Before adding the final finish, it's crucial to ensure your kayak is strong and waterproof. This involves adding fiberglass cloth and epoxy resin.

    Applying Fiberglass Cloth

    Fiberglass cloth is woven into a mesh-like material that provides additional strength and stiffness. It's applied over the hull, covering the entire surface with overlapping layers. Cut the fiberglass cloth to fit the shape of the hull and saturate it with epoxy resin. Use a roller or brush to smooth out any air bubbles, ensuring the fiberglass is evenly distributed.

    Adding the Finishing Touches

    Once the fiberglass is completely cured, you can apply a final finish to your kayak. This can be paint, varnish, or even a natural oil finish. Choose a finish that provides protection from the elements and enhances the natural beauty of your wooden kayak.

    Launch Day: The Moment of Truth

    After weeks or even months of hard work, the day has arrived. It's time to launch your handmade wooden kayak into the water! Take a moment to admire your creation, knowing you've built something truly special and unique. As you glide across the water, you'll feel a sense of pride and accomplishment, knowing you've crafted a vessel that is not only beautiful but also a testament to your skills and dedication. Enjoy your journey!

    Commonly Asked Questions

    Building a wooden kayak is a journey, not a race. It's an adventure that will challenge you and reward you in equal measure. You'll learn new skills, discover hidden talents, and create a truly personal vessel. If you're passionate about paddling and woodworking, building your own wooden kayak is an experience you won't forget.

    How much does it cost to build a wooden kayak?

    The cost of building a wooden kayak can vary widely depending on the materials, design, and your level of DIY skills. You can expect to spend anywhere from a few hundred dollars to several thousand dollars on a wooden kayak project. Here are some factors that can affect the cost:

    • Type of wood: Exotic hardwoods like mahogany or teak can be quite expensive.
    • Design complexity: A complex design with intricate curves and details will require more materials and labor.
    • Tooling: Some tools might need to be purchased, while others might be borrowed or rented.
    • Fiberglass and epoxy: The amount of fiberglass and epoxy resin needed will depend on the size and design of the kayak.

    With careful planning and budgeting, you can build a beautiful and functional wooden kayak within your budget.

    How long does it take to build a wooden kayak?

    The time it takes to build a wooden kayak depends on the design, your experience level, and how much time you can dedicate to the project. A simple kayak might take a few weeks to build, while a more complex design could take several months. It's important to be realistic about the time commitment involved and to break down the project into manageable steps.

    Do I need any prior woodworking experience?

    While it's helpful to have some woodworking experience, it's not strictly necessary to build a wooden kayak. There are plenty of resources available to help beginners learn the basics of woodworking. Start with a simple design and work your way up to more complex projects as you gain experience. Remember, patience, perseverance, and a willingness to learn are key to success in any woodworking project.

    Building a wooden kayak is a journey of discovery, a fusion of art and craft. It's a chance to connect with nature, celebrate craftsmanship, and create a vessel that reflects your unique style and personality. So, take the plunge, embrace the challenge, and build your own wooden kayak!

    Read More..

    DIY Guide: Making Your Own Homemade Duck Boat for Shallow Water Hunts

    DIY Guide: Making Your Own Homemade Duck Boat for Shallow Water Hunts

    DIY Guide: Building Your Own Shallow Water Duck Boat

    Embark on a thrilling journey into the heart of the marsh with a handcrafted duck boat designed for shallow water hunts. This comprehensive guide will equip you with the knowledge and skills to construct your own personalized vessel, perfectly tailored to your hunting style and local terrain. Let's delve into the materials, construction techniques, and essential tips for building a duck boat that will serve you well for years to come.

    Essential Materials

    Before diving into the build, gather the essential materials. This list provides a solid foundation, but you may need to adjust based on your specific design and location.

    Hull

    • Marine-grade plywood (1/2" or 3/4" thick): Forms the base of the boat and provides durability and resistance to water damage.
    • Epoxy resin and hardener: Provides watertight sealing and structural strength to the plywood hull.
    • Fiberglass cloth: Reinforces the hull and adds extra protection against impacts.

    Frame and Structure

    • Pressure-treated lumber (2x4s or 2x6s): Provides the framework for the boat's structure, ensuring its strength and rigidity.
    • Marine-grade screws or bolts: Securely fasten the frame together and attach the hull.

    Finishing

    • Paint (camo or other desired color): Camouflages your boat and protects the hull from the elements.
    • Non-slip paint or tape: Provides a secure footing on the boat's deck.
    • Hardware (hinges, latches, etc.): Add functionality to the boat, such as securing the deck, lids, or other compartments.

    Step-by-Step Construction

    Now that you've gathered your materials, let's build the boat! This guide outlines the core steps, but remember to consult detailed plans or blueprints for your specific design.

    Step 1: Building the Frame

    1. Cut the pressure-treated lumber to the dimensions specified in your plans. Use a circular saw or miter saw for precise cuts. 2. Assemble the frame according to your design. Use marine-grade screws or bolts to secure the frame pieces. 3. Ensure the frame is sturdy and square before proceeding.

    Step 2: Constructing the Hull

    1. Cut marine-grade plywood panels to the hull shapes outlined in your plans. 2. Glue and clamp the plywood panels together to form the boat's hull. 3. Apply multiple layers of epoxy resin and fiberglass cloth to the inside and outside of the hull, ensuring watertight sealing and structural reinforcement. Allow each layer to cure completely before applying the next.

    Step 3: Attaching the Hull to the Frame

    1. Use marine-grade screws or bolts to securely fasten the hull to the frame. Make sure the hull is properly aligned and sits flush against the frame. 2. Reinforce the connection between the hull and frame with additional layers of epoxy resin and fiberglass cloth.

    Step 4: Adding Finishing Touches

    1. Sand the entire boat to create a smooth surface. This will help the paint adhere better and create a more professional finish. 2. Apply your chosen paint to the hull, deck, and interior, using multiple coats for optimal coverage and durability. 3. Install hardware, such as hinges, latches, and handles, according to your needs. 4. Add non-slip paint or tape to the deck for safety.

    Important Considerations

    Building a duck boat involves more than just assembling materials. Here are some key considerations to ensure your boat is functional and safe.

    Boat Design

    Select a boat design that suits your hunting style and the shallow water conditions you typically encounter. Consider factors such as hull shape, draft (how deep the boat sits in the water), and capacity.

    Safety

    Always wear a life jacket while operating your boat. Consider adding additional safety features such as a kill switch, a whistle, and a flashlight. Understand the local water conditions and regulations before venturing out.

    Maintenance

    Regularly inspect and maintain your boat to ensure its longevity. This includes checking for leaks, inspecting hardware, and cleaning the hull after each use.

    Final Thoughts

    Building your own shallow water duck boat is a rewarding and fulfilling experience. By carefully following this guide, you can create a custom-made vessel perfectly adapted to your hunting needs. Remember, safety should always be your top priority. Enjoy the journey of building your own duck boat and the thrill of the hunt!

    Read More..

    How to Build a Wooden Skiff for River and Coastal Use

    How to Build a Wooden Skiff for River and Coastal Use

    Building a Wooden Skiff for River and Coastal Use

    A wooden skiff, with its timeless elegance and inherent seaworthiness, offers a rewarding project for the aspiring boatbuilder. This article will guide you through the process of constructing a classic skiff, suitable for both tranquil river voyages and exhilarating coastal adventures. While this guide provides a comprehensive overview, it's crucial to consult detailed plans and seek guidance from experienced boatbuilders for specific techniques and safety measures.

    Choosing the Right Design and Materials

    The first step is to select a design that aligns with your desired size, performance, and construction skill level. Numerous skiff designs exist, each with unique characteristics. Consider factors like:

    Length and Beam:

  • A shorter skiff (12-14 feet) is more maneuverable for rivers and smaller lakes.
  • Longer skiffs (16-18 feet) offer greater stability and cruising range, suitable for coastal waters.
  • Shape and Features:

  • Shallow-draft designs are ideal for navigating shallow rivers and mudflats.
  • Vee-shaped hulls provide stability and slicing through waves in choppy waters.
  • Flat-bottomed designs are stable but may be less efficient in rough conditions.
  • Material Selection:

  • Traditional materials like cedar, oak, and mahogany offer durability and a classic aesthetic.
  • Marine plywood provides a lightweight and cost-effective option, though it requires careful construction techniques.
  • Essential Tools and Equipment

    Before embarking on your skiff construction journey, ensure you have the following essential tools and equipment:

    • Hand tools: Saws, planes, chisels, hammers, screwdrivers, drill, and measuring tools.
    • Power tools: Table saw, band saw, jointer, thickness planer, router, and sander.
    • Boatbuilding specific tools: Steam bending tools, lofting tools, caulking tools, and epoxy mixing equipment.
    • Safety equipment: Eye protection, ear protection, respirator, gloves, and a well-ventilated workspace.

    Building the Skiff: Step-by-Step

    The construction process can be divided into several distinct stages:

    1. Design and Planning

    Obtain detailed plans from reputable sources. Study the plans meticulously, understand the construction sequence, and prepare a materials list. Consider using computer-aided design (CAD) software to visualize and refine the design.

    2. Lofting and Frame Construction

    Lofting involves transferring the boat's design from the plans onto a flat surface using chalk lines. This serves as a template for building the frames. The frames provide the skeletal structure of the skiff. They are typically made of strong, water-resistant wood like oak or cedar. Cut the frames to the precise dimensions specified in the plans.

    3. Planking the Hull

    Planking involves covering the frame structure with thin wooden panels called planks. The planks are meticulously shaped and fastened to the frames using screws or nails. The planking process requires skill and patience, ensuring a watertight and smooth hull. For plywood construction, the sheets are cut and laminated to create the desired thickness and shape.

    4. Decks and Superstructure

    The decks provide the walking surfaces and add to the skiff's structural integrity. Build the decks using plywood or planks, incorporating stringers for support. The superstructure, which includes the seats, gunwales, and other features, is constructed with strong, durable wood.

    5. Finishing and Details

    After the primary construction, the skiff is ready for finishing. This involves sanding the hull and deck surfaces smooth, filling any gaps or imperfections with epoxy or marine-grade filler. Apply a coat of marine-grade paint or varnish to protect the wood and enhance its aesthetic appeal.

    6. Rigging and Outfitting

    Depending on the design, the skiff may require a simple rigging system. Install any necessary oars, rowlocks, or motor mounts according to the plans. Add essential features like seats, storage compartments, and any desired hardware.

    Safety Considerations

    Building and using a wooden skiff demands safety awareness:

  • Use proper safety gear: Wear eye protection, ear protection, and a respirator when working with power tools and chemicals.
  • Work in a well-ventilated area: Avoid enclosed spaces, especially when applying epoxy or paint.
  • Follow all manufacturer's instructions for tools and materials.
  • Test the skiff thoroughly in calm waters before venturing into rough conditions.
  • Always wear a personal flotation device (PFD) while on the water.
  • Tips for Success

    Here are some tips to enhance your skiff building experience:

  • Start with a simpler design for your first boatbuilding project.
  • Seek advice from experienced boatbuilders and join online forums or local woodworking clubs.
  • Take your time and be meticulous in each step of the construction process.
  • Invest in quality tools and materials for the best results and durability.
  • Celebrate your achievements and enjoy the journey of building your own skiff.
  • Building a wooden skiff is a rewarding experience that combines craftsmanship, skill, and passion. By carefully following the plans, utilizing appropriate tools and techniques, and paying attention to safety, you can create a beautiful and functional skiff that will provide countless hours of enjoyment on the water.

    Read More..